THE PERFECT CAMPFIRE (INFOGRAPHIC)
Fire has been with us since time immemorial and the correct utilization has been the driving force that has literally given us everything that we have today; from modern homes to planes, computers and even smartphones, all of these technological advancements that we have today came from fire.
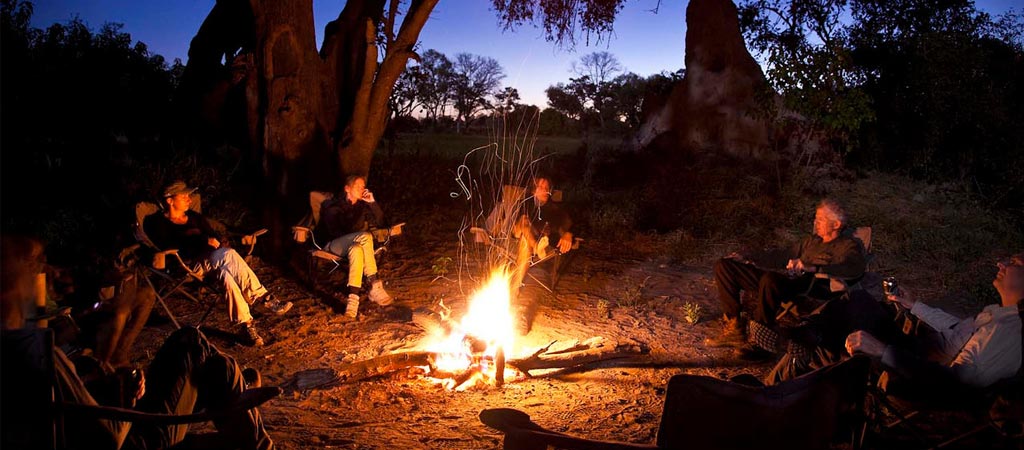
However, fire has many other aesthetically appealing uses, such as, a campfire where we can roast mallows, barbecue a decent feed and, of course, tell stories and enjoy the company of our family and friends. If seen in this way, it is the duty of every real man to know how to create a perfect fire and luckily for you, we’re here to teach you to create the perfect, blazing campfire from start to finish.
Needed Materials:
These are the basic materials that you need to start your perfect campfire. Matches, or another firestarter, are obviously essential. Next you’ll need some tinder; tinder should be small dry sticks, twigs, leaves or moss. These will catch fire quickly and allow your kindling to catch fire efficiently.
Next you’ll need kindling; kindling consists of sticks and scraps of wood that are larger than tinder but should generally still be smaller than 1 inch in diameter. Your fuel is the last step in the creation of your actual fire; fuel consists of dry wood a couple of inches in diameter and is of utmost necessity. Lastly, the final needed material would be water; nobody wants to start a fire without having the ability to douse it in case something goes awry.
Get Building:
Three things are needed for the successful creation of a fire; oxygen, heat and fuel. If any of these are taken out of the equation your fire will not burn.
It is important to note that higher altitudes have less oxygen and that it will be more difficult to start a fire in these places. The heat should also be between 750-800 degrees to reach the kindling point or, at the very least, the minimum temperature at which the wood will burn.
Step 1:
Find the ideal location
The location of your fire should be placed strategically; meaning that it should be at least 15 feet away from any trees, bushes or brush and also, at least, 15 feet away from your camping gear.
Step 2:
Create a protective pit
To create your protective pit you need to clear a circular area with a diameter of 10 feet of any twigs, leaves, grass and firewood. You should then dig a small hole and then surround it with rocks.
The purpose of this it should be obvious but it allows for a higher degree of safety since your fire will be slightly below ground level there is much less of a chance that the wind will disturb your fire and carry a flame to any combustibles on the ground.
Step 3:
Place your tinder evenly in the pit.
Step 4:
Arrange your kindling in one of the following ways:
Tipi – Lay kindling vertically over your tinder in the shape of a teepee. This arrangement is great for cooking.
Cross – In this method you lay the kindling in a criss-cross over the tinder. This method allows for long lasting burn time.
Lean-to – In this arrangement you take a large piece of kindling, stick the one end into the ground and lean it over your tinder. You then lean smaller pieces of kindling against the large piece. This style is good for cooking as well.
Log Cabin – This method is the most ideal for cooking. You line the tinder with the kindle at right angles by laying your largest pieces first and then you lay the smallest at the top. This creates a square of kindling that can support cookware if built sturdy enough.
Step 5:
The best step to see your handy work is obviously to light it up.
Light the tinder in numerous places to allow for sufficient burning from these different spots. Add more oxygen by very gently blowing at the base of your fire and, if necessary, add more tinder if your kindling takes too long to start burning.
Step 6:
Here’s one of the most fun steps that can make you go from perfect campfire to blazing bonfire by making it bigger.
Gradually add larger sticks and pieces of wood so that you can give your fire proper fuel and make it burn steadily.
Voilà! You have just learnt how to make the perfect campfire from start to finish but there are still a few points that need to be heeded. They are:
Staying Safe:
How to extinguish your fire:
Allow your wood to burn completely to ash. You then our ample water on the fire to drown out the ashes and continue adding water till the hissing stops. Take a shovel then stir the ashes and embers while scraping any leftover sticks and logs to remove any remaining embers from them. Keep stirring until all contents are wet and cool to touch.
*If you don’t have water available use dirt instead. Mix dirt with embers until everything is cool.
Do’s and Dont’s:
Dont’s:
You should never leave your fire unattended, cut down live trees or branches to use as fire fuel, burn dangerous materials such as aerosol cans, glass, aluminium and you should never bury your fire, it will continue to smolder underneath.
Do’s :
All in all, camping with the proper equipment and the right people is an amazing experience that everyone should have once in a while. Building the perfect campfire is also a journey and with a little bit of time, patience and practice you will have you own campfire up and burning in a jiffy. [via]


Daily Newsletter
Subscribe to Jebiga for a dose of the best in gear, design, rides, tech and adventure.