Lose out the free space on iPhone? Must-Know Tricks to Transfer photos to PC
Apple is one of the most popular companies in the world right now and they certainly like to be “one of a kind”. Of course, this is not meant in a negative context, they just have that bug for being unique and doing things their own way. That is why they use different operating systems for their devices, but that can sometimes raise questions among users.
One of those questions certainly is the one on how to transfer photos from iPhone to computer in order to free up some space. What apple did is they made an iTunes version for computers in order to make things easier for their users, but most of them might still look for ways to transfer photos from iPhone to computer by avoiding iTunes. This is due the consumers’ desire to protect their data, have more flexibility and control and to avoid data loss during media syncs. That is why we are providing you with some of the best iTunes alternatives.
From iPhone to PC with iTunes
Before mentioning the best iTunes alternatives, let’s see how you can transfer your photos from an iPhone to your PC. If you are a passionate user, you probably have iTunes installed on your computer that is provided by Apple. So, what happens when you transfer data like this, iTunes automatically synchronizes photos between your PC and your iPhone. However, this only works if you’re syncing photos from iPhone to a computer, not vice versa. In order to do this all you have to do is follow these five steps:
• Download a PC version of iTunes from Apple’s website for free and install and launch it on your computer.
• Connect your iPhone to your computer via USB cable and click on the device icon situated at the top part of the interface of iTunes.
• Click on “Photos” in the side pane and main screen of iTunes and check the box for “Sync Photos”.
• Select “All photos and album” preference or some specific files you wish to transfer and click “Apply”.
• Wait for the synchronization to complete and click “Done”.
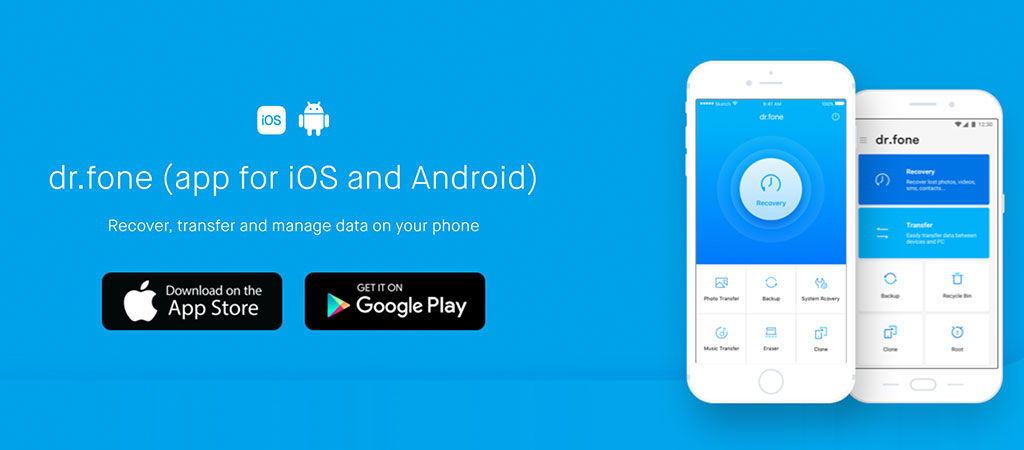
From iPhone to PC with dr.fone – Transfer
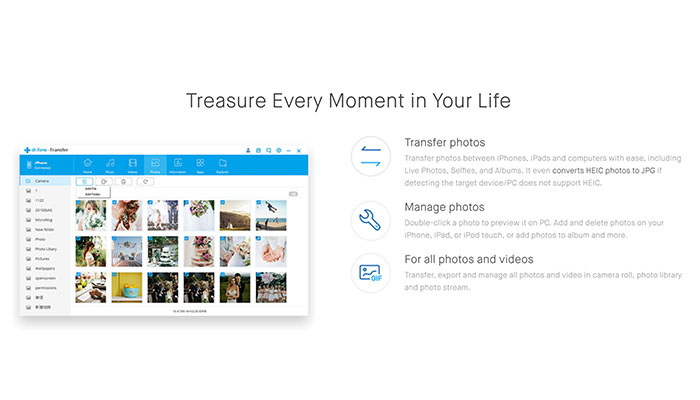
Ever since it appeared on the software market, dr.fone has proven to be one of the best toolkits for iPhone. Besides data transfering, it includes a number of amazing features, including data recovery, switch from one phone to another, iOS system repairs, device rooting and so on. What is great about this software is that it gives the user flexibility during the data transfer without any risks of losing it why synching. So, if you wish to use dr.fone to transfer photos from iPhone to computer, you should follow these simple steps:
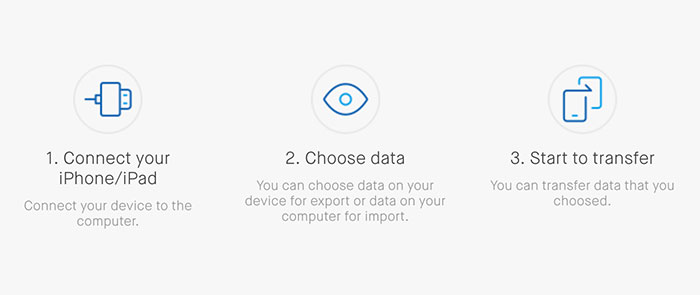
• Download dr.fone and install it on your PC. After launching the software, choose “Transfer” from the home screen.
• Connect your iPhone to the computer and click “Transfer Device Photos to PC”.
• Dr.fone will immediately start scanning your iPhone for all photos. After it is done, you can choose where you wish to save the photos on your computer via popup window and start transferring photos to your PC.
• If you wish to transfer photos from iPhone to computer selectively, click on “Photos” tab in the interface and check the photos you wish to transfer, and voila!
From iPhone to PC via Windows Explorer
This is yet another iTunes alternative, and you are probably already familiar with it. You are simply using the built-in Windows Explorer that every PC with Windows OS has. Simply follow these steps:
• Plug in your iPhone into the computer with your USB cable.
• Grant access to your device by clicking on “Trust” button on the iPhone screen.
• Open “My Computer” on your Windows, and your iPhone should appear under “Portable Devices” section.
• Click on the device storage and look for a folder named “DCIM”. Here, all the photos from your iPhone are stored and you can simply copy/paste the desired images to a desired location on your computer.
From iPhone to PC using Autoplay
This method kind of looks like the previous one, but in order to use it you have to activate the Autoplay features on your PC. After that is enabled all you have to do is:
• Use USB cable to connect your iPhone to your PC and grant permission by tapping “Trust” on the popup on your phone.
• On your computer there will be displayed a popup named “Autoplay”. Click on “Import pictures and videos”.
• Click “Import settings” in order to specify the location of where to copy the files.
• When the next window appears, click “Browse” in front of “Import images to” option in order to transfer files to the desired folder.
• Click “OK” when done with the settings.
From iPhone to PC using iCloud
We all like storing files on our iCloud in order to free up space on the device, but what happens when the Cloud gets crowded. You can simply transfer photos from the Cloud into your computer, but make sure to first backup your photos to the iCloud library and then you can begin synchronizing:
• Navigate to “Settings” on your iPhone.
• Here, tap on Name or Apple account ID and click on “iCloud” on the next screen. Tap “Photos” option and select “My Photo Stream”.
• In the iPhone photos app, tap “Shared” at the bottom of your screen and create a shared photos name. Tap “Next”.
• Tap on the album you just created and tap on “+” sign to add photos you wish to transfer to the album. Tap on “Post” to send the photos to the iCloud.
• Download iCloud software for your computer and install and launch the app. Click on “Option” next to “Photos” on your iCloud window in order to see options, settings and preferences.
• Check “My Photo Stream” and select the location where you want your photos downloaded on the computer. Click “Done”.
• From the left pane of Windows Explorer, click “iCloud Photos”, select “Shared” folder to see the album you created on your iPhone.
Basically this is it. You don’t have to rely on iTunes in order to transfer photos from iPhone to computer. There are different, even much simpler and safer ways to do this. All you need is some basic computer skill and an USB cable.


Daily Newsletter
Subscribe to Jebiga for a dose of the best in gear, design, rides, tech and adventure.